
This post may contain affiliate links. Please read my disclaimer.
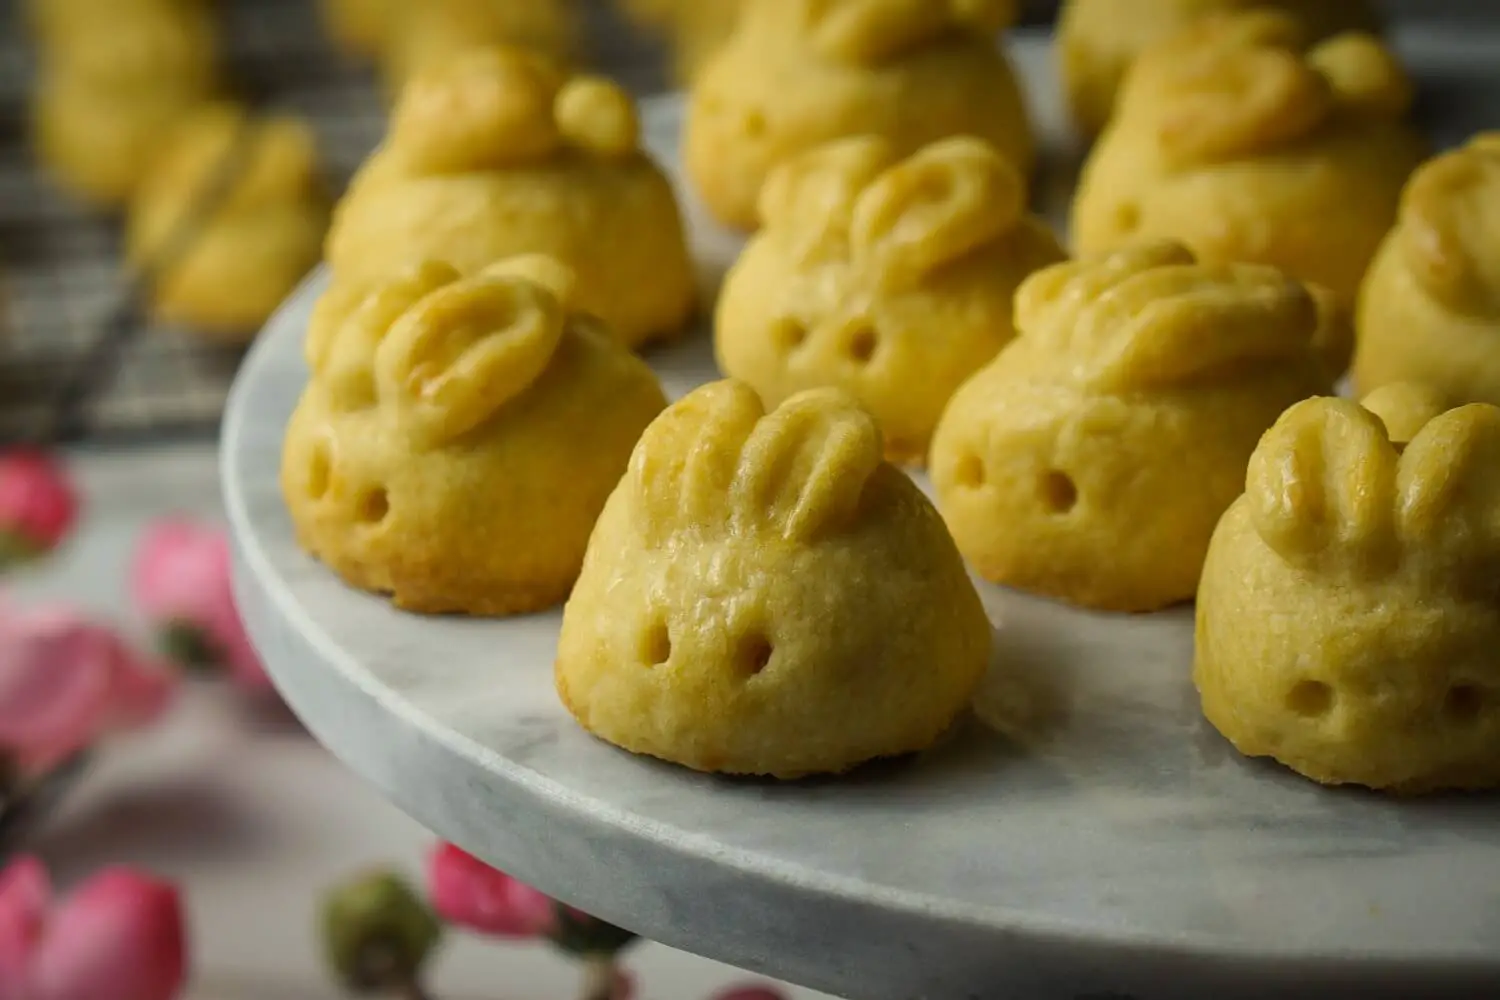
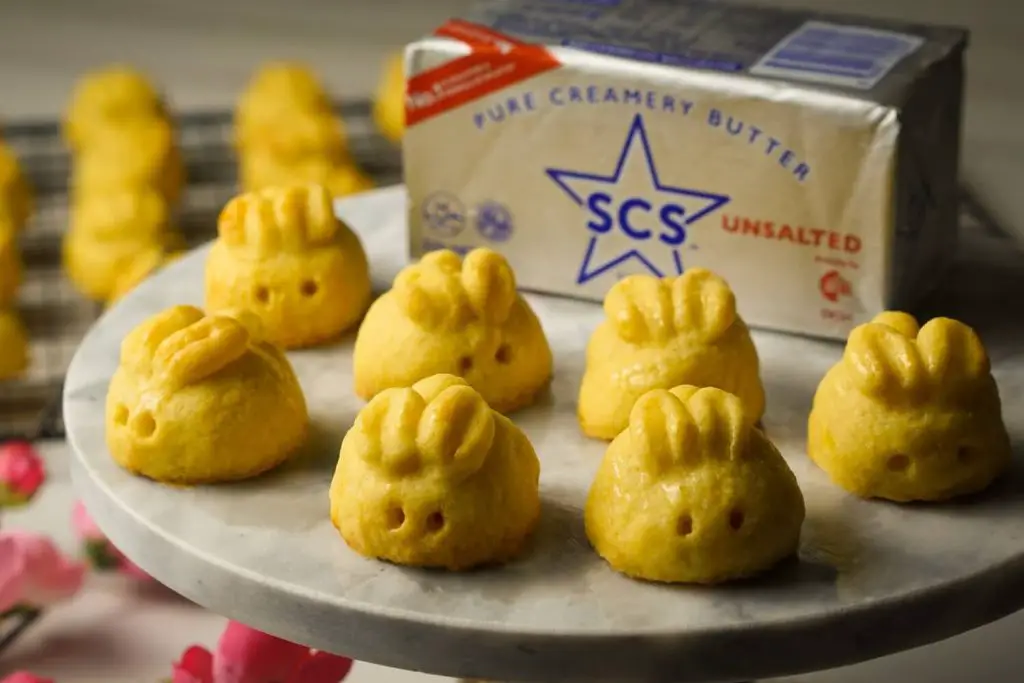
Every Chinese New Year, making pineapple tarts have become a tradition in my family, although mainly it’s me who’s making for my family. And every year, I like to make pineapple tarts of different shapes and flavour. (Do check out my cheesy pineapple tarts, it’s a big hit with my family and probably the only cookie that my family will request for.) For this post, I’m collaborating with SCS and YoRipe to create buttery bunny pineapple tarts using SCS unsalted butter. Nearly half of Singaporeans choose SCS for their butter (the unsalted butter are almost sold out when I went to buy it at the supermarket!) and the butter is produced using double churn method, that gives the signature creamy and extra smooth texture.
How to make the bunny pineapple tart shape?
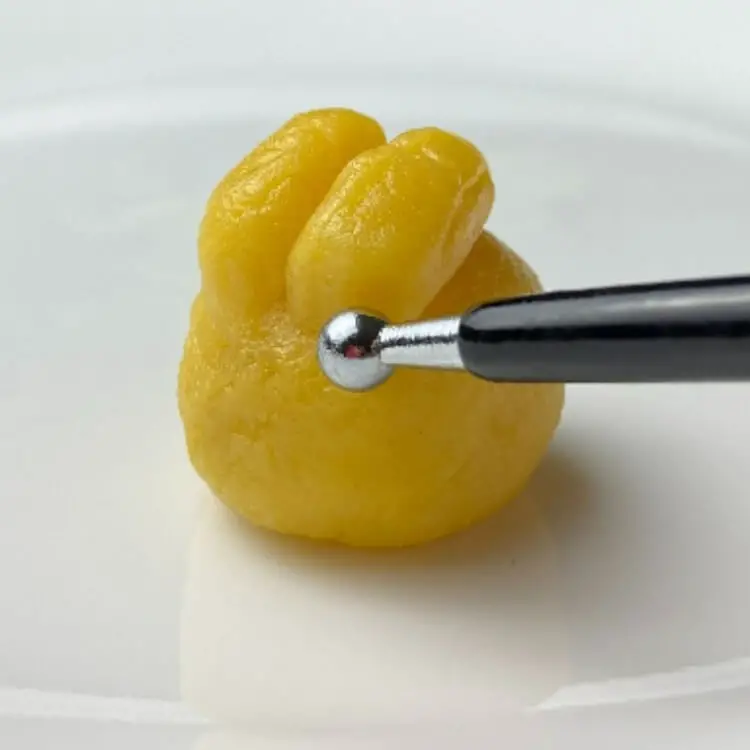
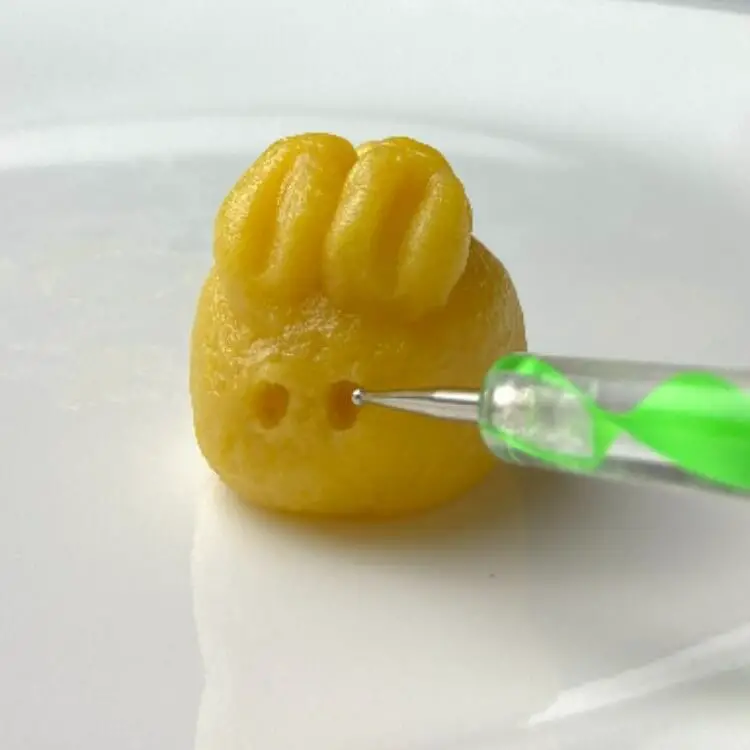
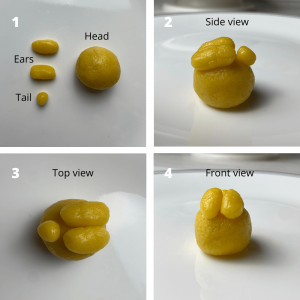
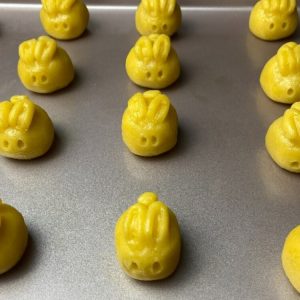
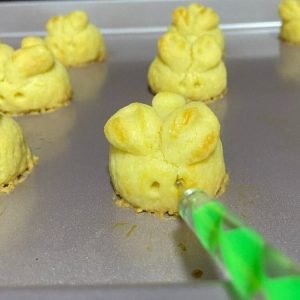
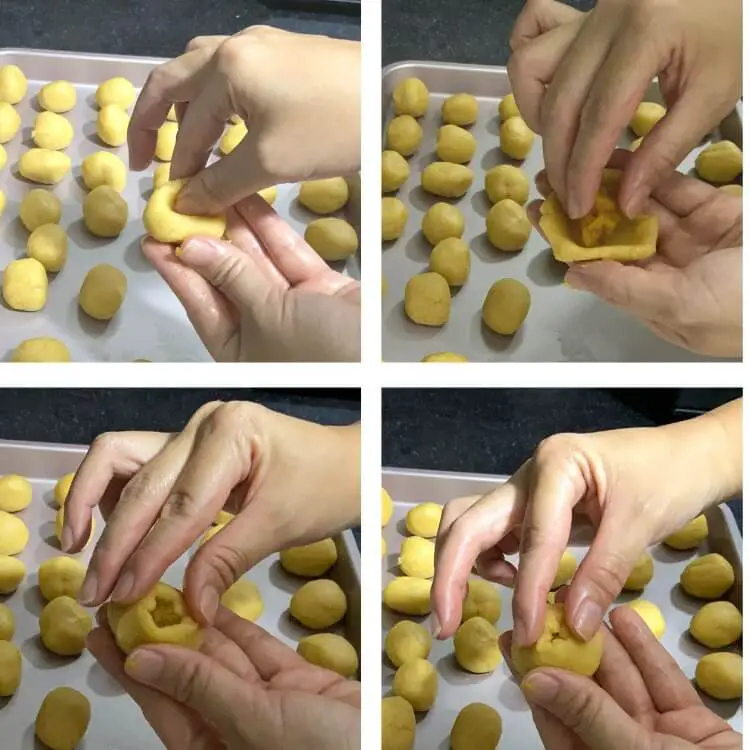
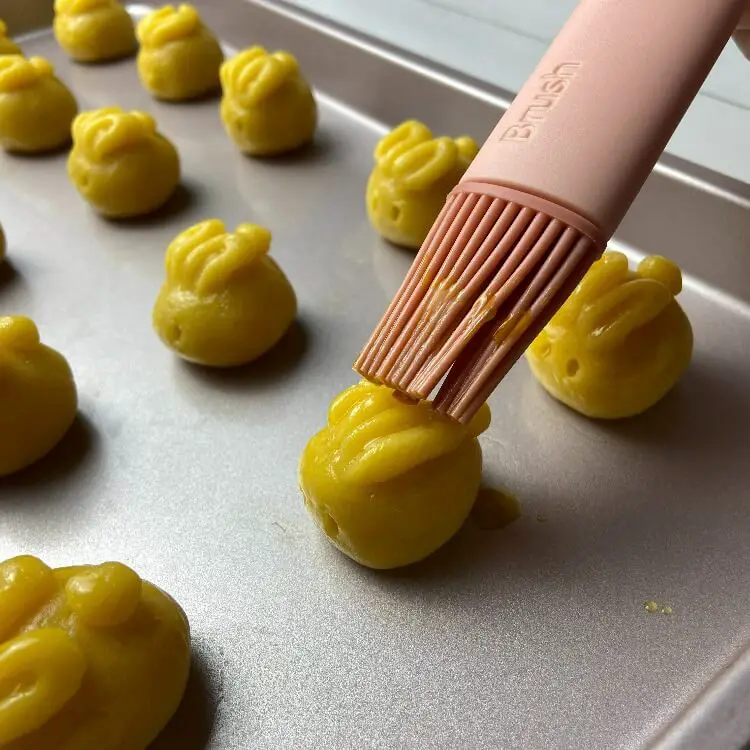
I bought a 20g rabbit mould but the imprints can hardly be seen after baking. So nothing beats shaping the bunny myself. Shaping it is very easy, I used clay modeling tools which makes life really easier but you can use your finger, or tiny spoons and toothpicks too. Make the main ‘head’ with the pineapple jam wrapped in, use the same tart dough to make a small little ball as the tail, and two rectangular pieces as the ears. Poke two big holes as the eyes. It’s ok to make it bigger as the eyes will ‘close’ a little when you apply the egg wash and right after baking. So the trick here is to make the eyes bigger again after apply egg wash and right after baking.
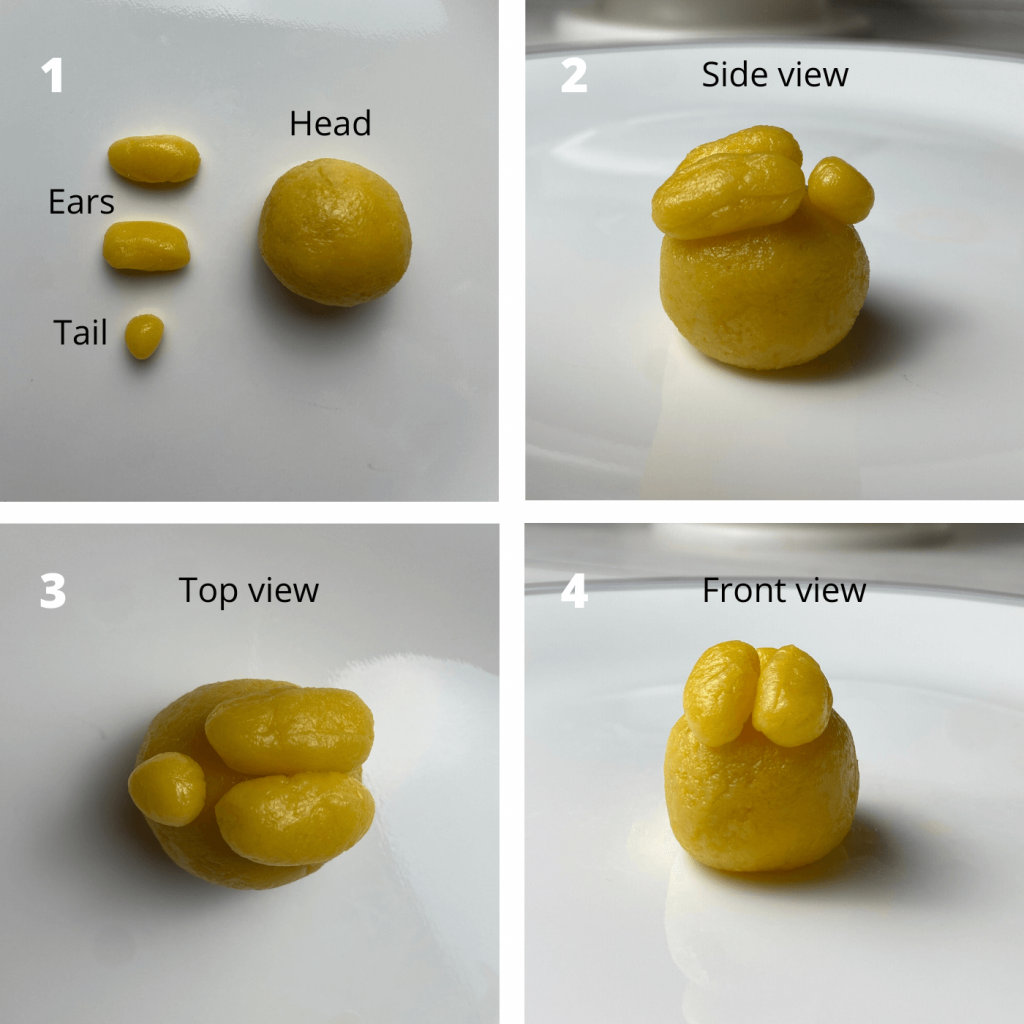
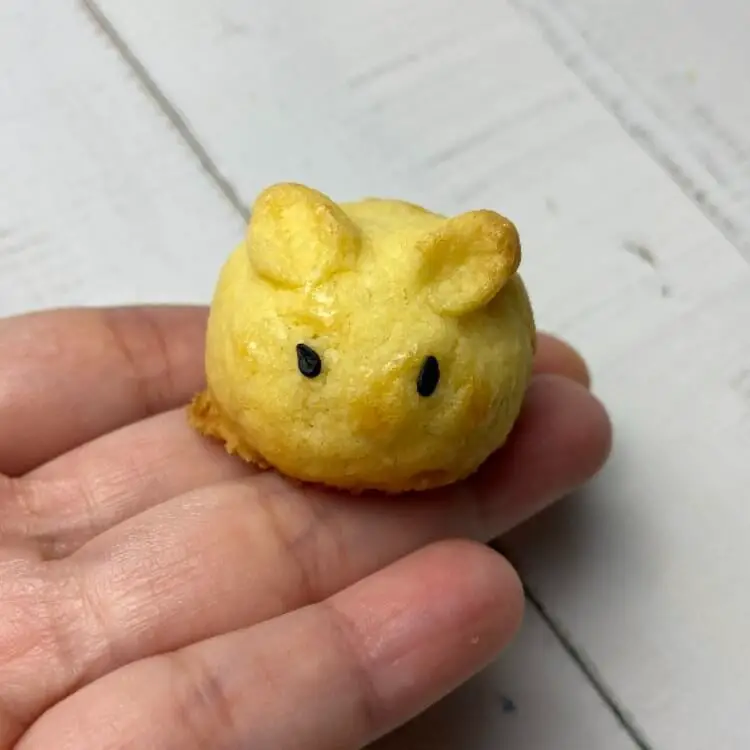
Just a word of caution, do not make short ears, as the bunny will end up looking like a rat. I have also used black sesame seeds as the eyes initially, it looked like a rat too. See the picture below and you will understand why.
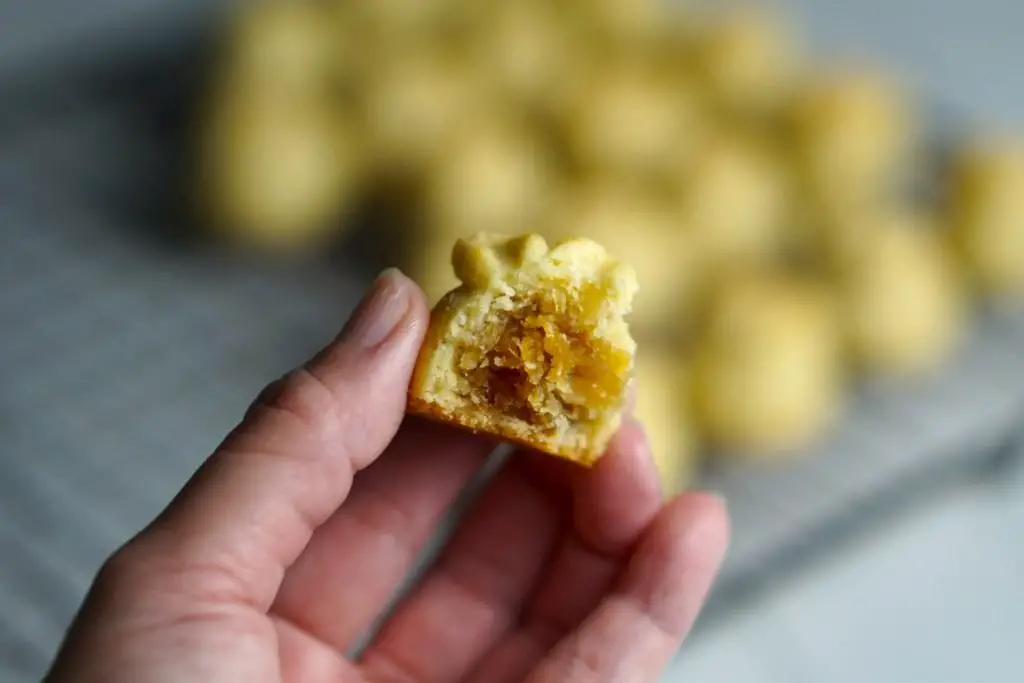
I made the pineapple jam from scratch, this time round being less ambitious, using only 2 pineapples which took me 1 hour to cook it down (versus 4 very ripe pineapples that took me 4 hours to cook down *scream*).
Homemade pineapple jam has all the benefits over store bought ones, albeit their labels might indicate low sugar. I used only Demerara unrefined cane sugar in my jam, and chose pineapples that are just ripe and taste just at the right sweetness and tartness. With no preservatives added, the pineapple jam will not last too long but good enough to keep in the fridge for about a week before I bake it in the pineapple tarts. I love the strong spiced aroma of the cinnamon, cloves and star anise in the jam, even though my mummy commented the cloves and star anise should be reduced. The jam is much more moist and less rigid than store bought ones of course, the amount of sugar and additives added are non-existent.
If you have an air fryer, you can cut down the cooking down time slightly by using the dehydrate mode. See the tutorial here.
For more Chinese New Year cooking and baking, do check out these recipes:
- E-Fu Noodles with Braised Abalones and Broccoli 鲍鱼西兰花伊府面
- Cold Truffle Capellini with Abalone and Black Roe
- How To Lou Hei Yu Sheng For Chinese New Year
- Air Fryer Roast Pork Belly Recipe (Sio Bak or Siu Yuk)
- Air Fryer Ngoh Hiang (Chinese Pork Roll)
- Cheesy Buttery Pineapple Tarts
- Melt-in-Your-Mouth Pineapple Tarts (open and closed shapes)
- How To Make Pineapple Jam for Pineapple Tarts 自制凤梨果酱
- Air Fryer Pineapple Jam

Watch how to make Melt-in-your-mouth Bunny Shaped Pineapple Tarts on YouTube
Pin now, bake later
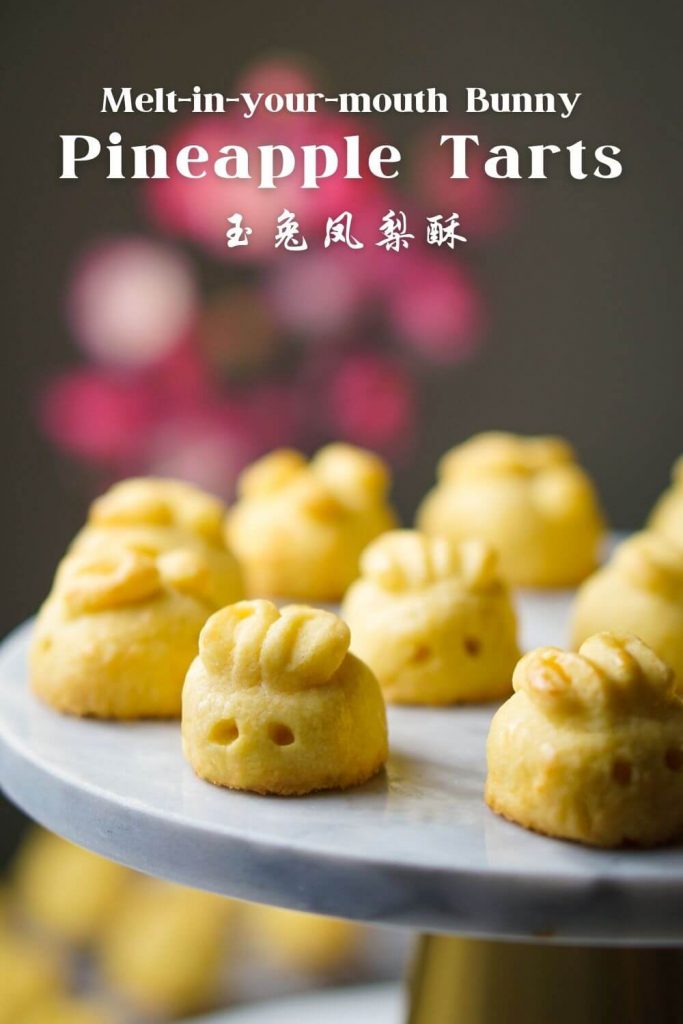
Melt-in-your-mouth Bunny Shaped Pineapple Tarts 兔年凤梨酥 (Rabbit Shaped Kue Nastar)
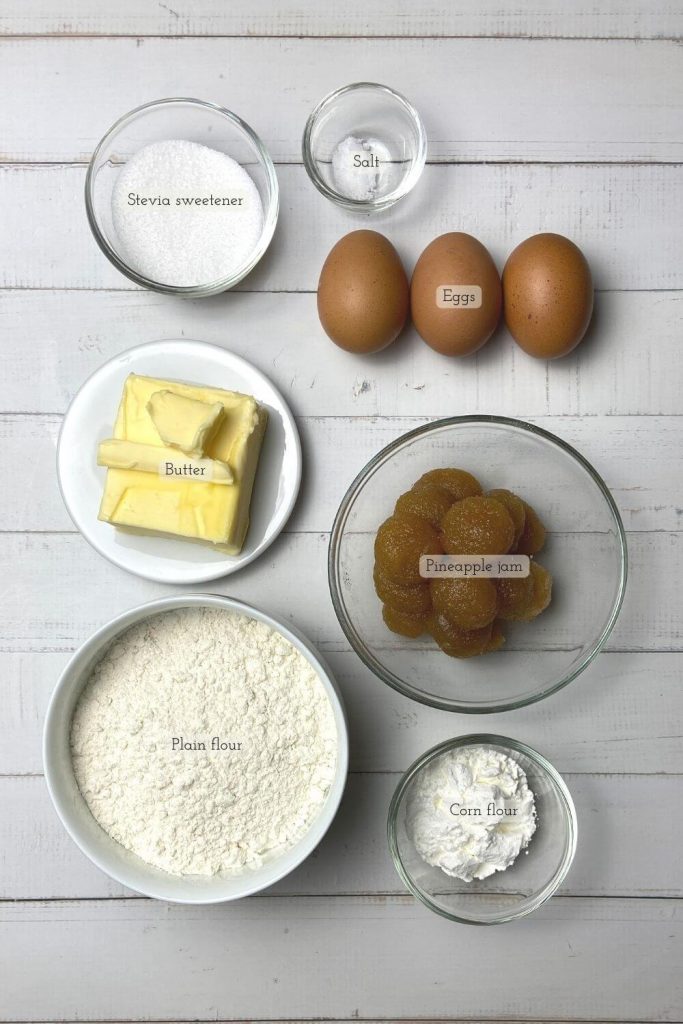
Ingredients
Pineapple jam
- 2 just ripe pineapples about 1.5 kg each
- 1 cinnamon stick
- 1-2 star anise use the minimum if you prefer less spiced aroma
- 1-3 cloves use the minimum if you prefer less spiced aroma
- 85 g Demerara unrefined cane sugar
- 1 tbsp freshly squeezed lemon juice
Tart dough
- 160 g unsalted butter chilled and cubed
- 200 g plain flour
- 25 g corn starch or corn flour (in Asia)
- 50 g Stevia sweetener or icing sugar or castor sugar
- 2 egg yolks about 60g in total
- 1 egg beaten for egg wash
- ¼ tsp fine salt
Instructions
Make the pineapple jam
- Cut off top, bottom, skin, core and eye of 2 pineapples. Pat dry with paper towel.2 just ripe pineapples

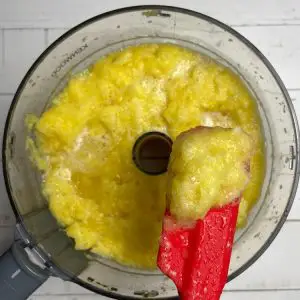
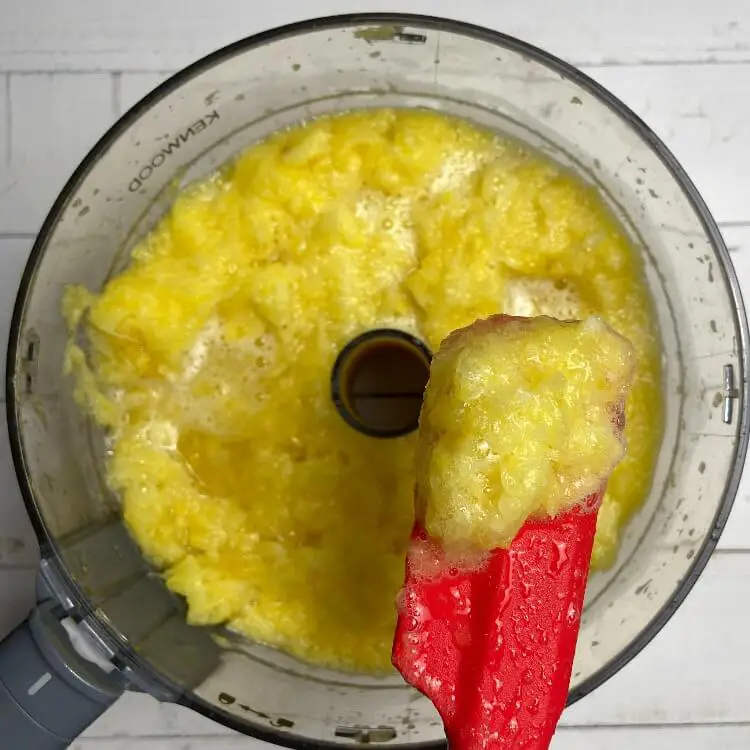
- Cut pineapples into smaller pieces. Grate in food processor until pineapple chunks become fine pieces of pineapple, but not until it turns completely puréed.
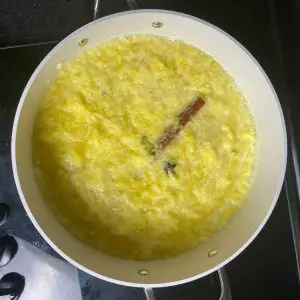
- Transfer grated pineapple into large base non-stick pan and boil over high heat. Add 1 cinnamon stick, 1-2 star anise, and 1-3 cloves and stir well. Once boiled, reduce heat to a simmer.1 cinnamon stick, 1-2 star anise, 1-3 cloves
- The pineapple jam will thicken and liquid will reduce. Stir frequently to prevent from being burnt.
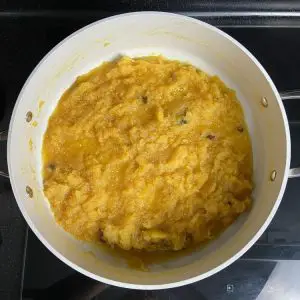
- When the liquid reduces to about 10% of the pineapple, add 1 tbsp freshly squeezed lemon juice and gradually add 85 g Demerara unrefined cane sugar, adjust sweetness according to preference.85 g Demerara unrefined cane sugar, 1 tbsp freshly squeezed lemon juice
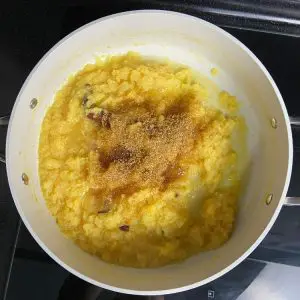
- Continuously stir the pineapple jam over low heat until the jam thickened and there is no visible liquid. Turn off the heat. Remove cinnamon, star anise, and cloves. Allow the jam to cool completely.Note: If there is still liquid in the pineapple jam after it is cooled down, cook again over low heat and keep stirring until there is no more liquid. Store in air-tight container in refrigerator until ready to use.

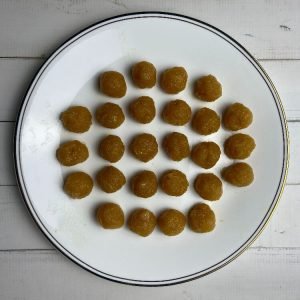
- Chill in fridge. And when ready to use, roll into 6g balls.Note: size of the jam ball is up to your preference. I'm using 6g jam and 10g dough.


Make the dough
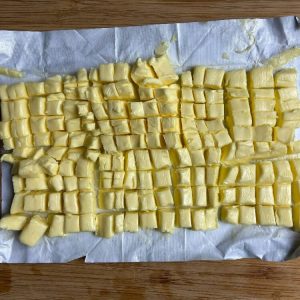
- Cut chilled unsalted butter into small cubes (about 1.5cm) and chill in fridge until ready to use.160 g unsalted butter
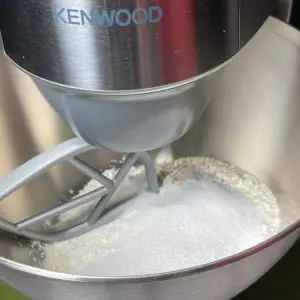
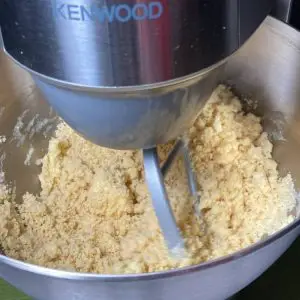
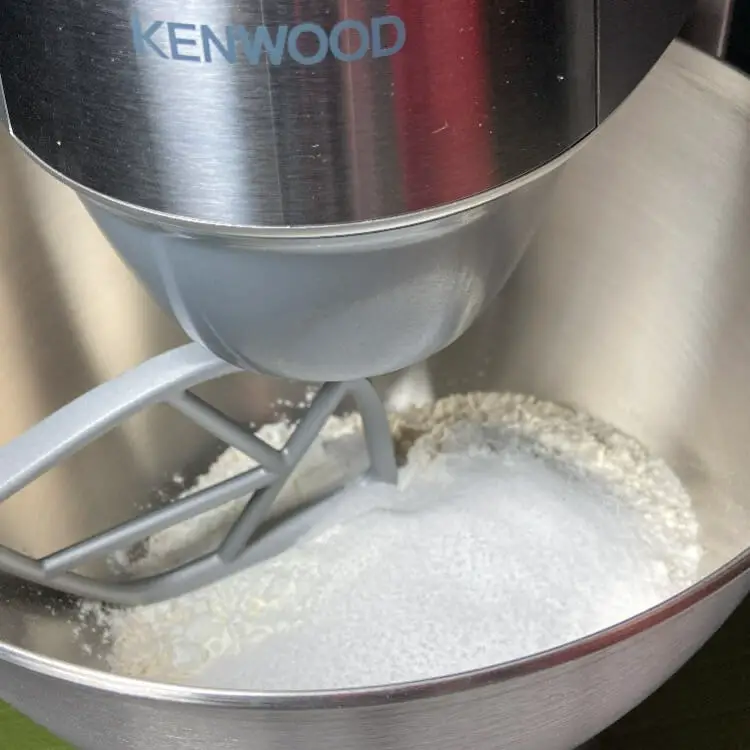
- Add 200 g plain flour, 25 g corn starch, 50 g Stevia sweetener, fine salt into a food mixer with paddle attachment. Mix on low speed for a few seconds.200 g plain flour, 25 g corn starch, 50 g Stevia sweetener, 1/4 tsp fine salt
- Add chilled butter cubes to mixed flours and beat on low speed until mixture turns sandy.
- Separate 2 eggs and beat the egg yolks. Add the egg yolks into the mixture and beat on low speed until a consistent dough is formed. Do not overbeat.2 egg yolks
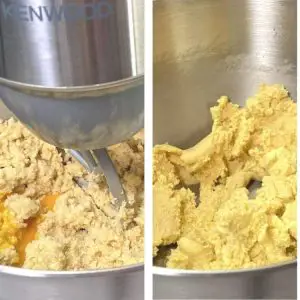
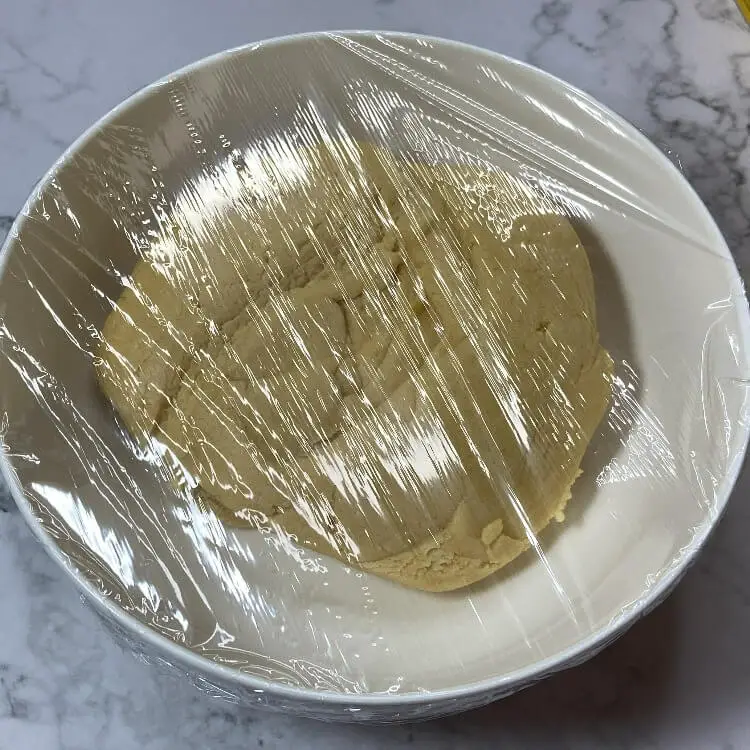
- Remove dough from mixing bowl and shape into a ball. Wrap in cling wrap and let rest in fridge for 30 minutes.

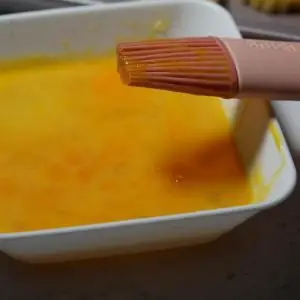
- Beat 1 egg to make egg wash.1 egg
- Roll out a dough ball (about 10g), make a hole in the middle, place pineapple jam (about 6g) in, gently push the edge of the dough to cover the pineapple jam completely. Roll into a round shape.
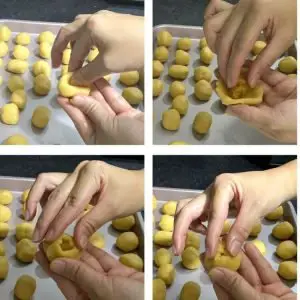
- Use the same dough and make small round balls for the tail and rectangular shapes for the ear. Place the round balls and the rectangular shapes on top of the main pineapple tart.
- Use a modelling tool (or a small spoon or your finger) to 'merge' the ears to the front of the face.
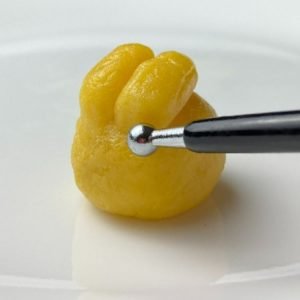
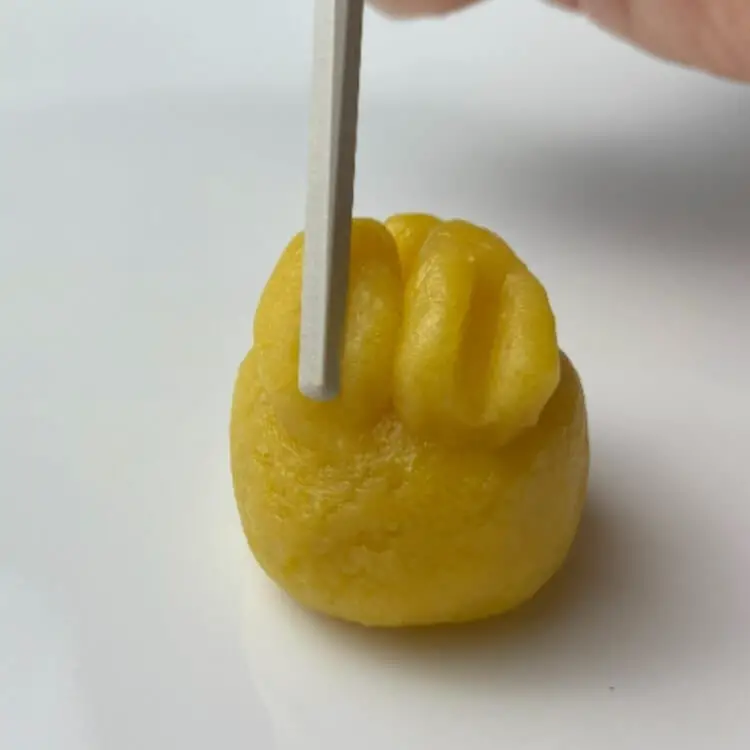
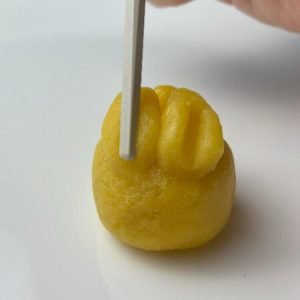
- Use a chopstick to make imprints on the long ears.
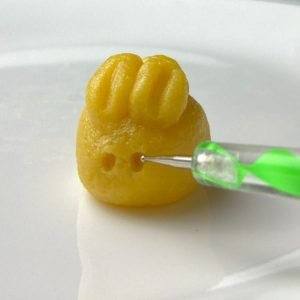
- Use a modelling tool (or toothpick) to make holes to resemble the eyes. Note: It's ok to make the eyes bigger as the eyes will 'close' a little when you apply the egg wash and right after baking. So the trick here is to make the eyes bigger again after apply egg wash and right after baking.
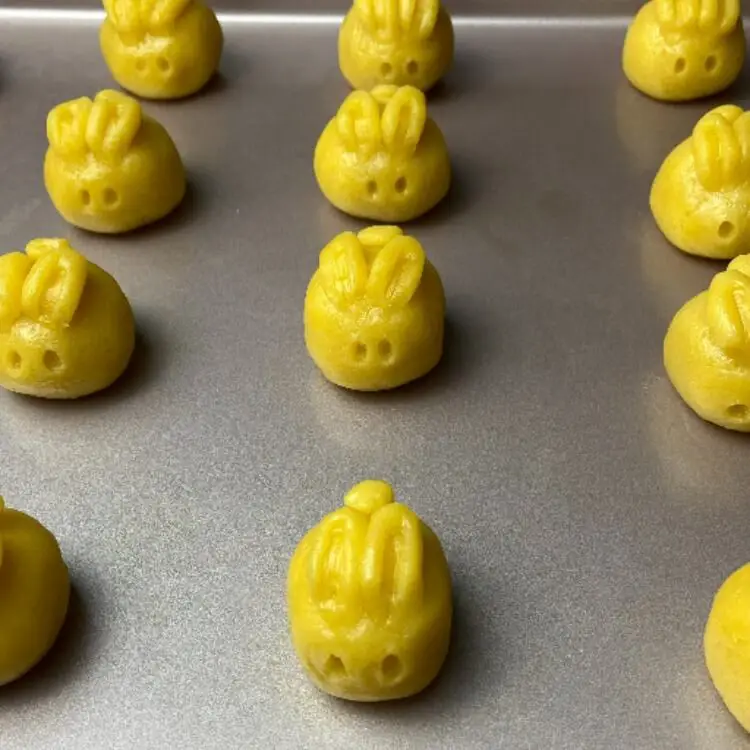
- Place the bunny tarts on a non-stick baking tray (or parchment paper on baking sheet) at least 1-2 inches apart.
- Apply a thin coat of egg wash evenly.Note: the eyes will close a little after applying egg wash, you can make the hole of the eyes bigger again at this stage.

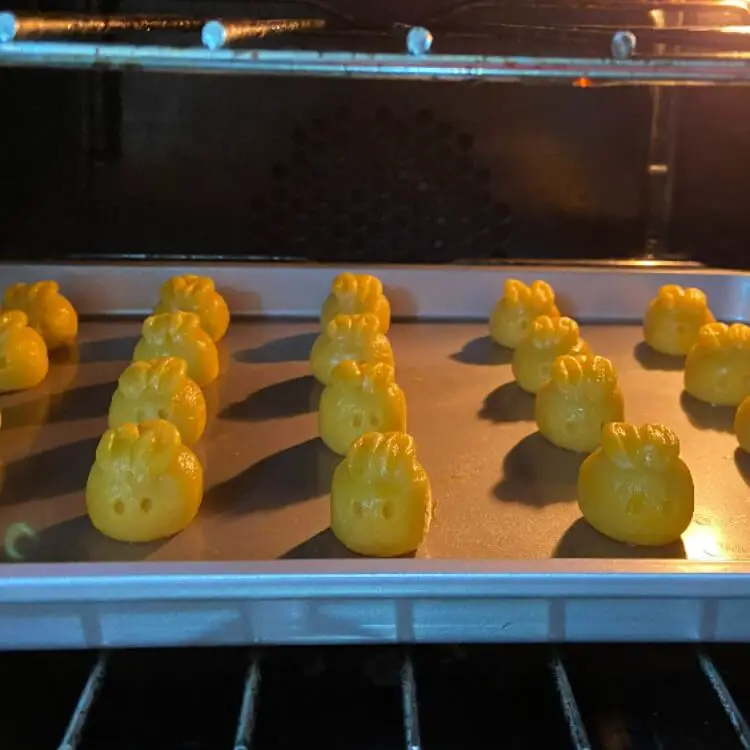
- Bake in pre-heat oven at 170C / 338F (convection oven) or 180C / 356F (conventional oven) for 10-15 minutes, until golden brown. Note: before baking, if the dough is soft, chill in the fridge for about 5-10 minutes before baking it. The dough should ideally be a little more firm when it's put into the oven.
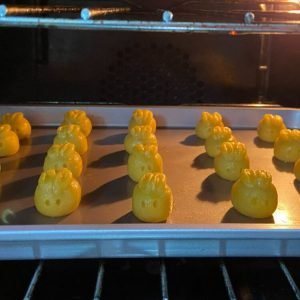
- Once baked, if the eyes become smaller, use a modelling tool or toothpick to make the eyes bigger again.
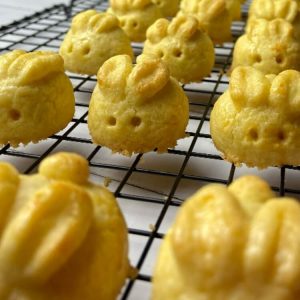
- Allow the pineapple tarts to cool for about 30-60 min before storing in air-tight containers.Note: it's normal if the pineapple tarts crack a little when it's fresh out of the oven.


Video
Notes
Nutrition
Sharing this recipe with Fiesta Friday.
 Abalone Carpaccio with Yuzu Honey Dressing
 Baked Honey Glazed Pork Ribs (Fall Off The Bone) with A Side of Roast Potatoes
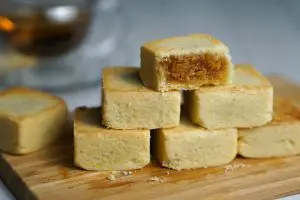


22 March 2023 at 8:01 amThese tarts are so bunny cute!
22 March 2023 at 8:08 amThanks Melanie!